Spring Boot 내장 웹 서버 응용
Spring에서 서블릿 기반의 Web Application을 개발할 때 톰켓을 사용하게 된다.
- 기본적으로 Spring의 의존성으로 톰켓이 포함되어 있다.
- Why ? 지난 포스트에서 확인하였듯 자동 설정에 의해 톰켓용 자동설정 파일이 읽혀지고 톰켓을 쓰게 된다.
이러한 내장 웹 서버를 응용할 수 있는 것들은 어떤 것들이 있을까 ?
1. 다른 Servlet Container 사용해보기
다른 Servlet Container 를 사용하기 위해선 어떻게 해야할까 ?
우선 스프링 프로젝트를 생성한 후 pom.xml의 dependency에서 tomcat을 제거해준다.
pom.xml
    <dependency>
        <groupId>org.springframework.boot</groupId>
        <artifactId>spring-boot-starter-web</artifactId>
        <exclusions>
            <exclusion>
                <groupId>org.springframework.boot</groupId>
                <artifactId>spring-boot-starter-tomcat</artifactId>
            </exclusion>
        </exclusions>
    </dependency>
spring-boot-starter-web에서 tomcat을 가지고 있다. 따라서 위와 같이 톰켓을 제거할 수 있다.
그 후 다른 servlet container를 추가해 주면 된다.
    <dependency>
        <groupId>org.springframework.boot</groupId>
        <artifactId>spring-boot-starter-jetty</artifactId>
    </dependency>
jetty외의 다른 서블릿 컨테이너도 사용할 수 있다. spring-boot-starter-{cocntainer이름}와 같은 형식으로 적어주면 된다.
2. HTTPS 사용해 보기
HTTPS를 사용해보기 위해서는 우선 키를 발급받아야 한다.
IDE terminal에 아래의 명령어를 사용하여 keystore를 생성한다.
keytool -genkey -alias tomcat -storetype PKCS12 -keyalg RSA -keysize 2048 -keystore keystore.p12 -validity 4000
위의 명령어를 입력하면 다른 추가 정보를 입력하도록 콘솔창에 출력된다.
Enter keystore password:
Re-enter new password:
What is your first and last name?
  [Unknown]:  Seongmun Hong
What is the name of your organizational unit?
  [Unknown]:  ...
What is the name of your organization?
  [Unknown]:  ...
What is the name of your City or Locality?
  [Unknown]:  ...
What is the name of your State or Province?
  [Unknown]:  ...
What is the two-letter country code for this unit?
  [Unknown]:  ...
Is CN=Seongmun Hong, OU=..., O=..., L=..., ST=..., C=... correct?
  [no]:  yes
모든 내용을 입력한 후 마지막에 확인하는란에서 yes를 입력해주면 keystore가 생성된 것을 확인할 수 있다.

위와 같이 생성된 keystore 내용을 application.properties에 입력해 주면 된다.
application.properties
server.ssl.key-store=keystore.p12
server.ssl.key-store-password=123456
server.ssl.keyStoreType=PKCS12
server.ssl.keyAlias=tomcat
# key store가 root가 아닌 리소스 폴더에 들어있다면 classpath:keystore.p12와 같은 식으로 입력해주면 된다.
해당 프로젝트를 실행시켜 본 후 http://localhost:8080 으로 접속해 보면 아래와 같이 접속이 되지 않는 것을 확인할 수 있다.

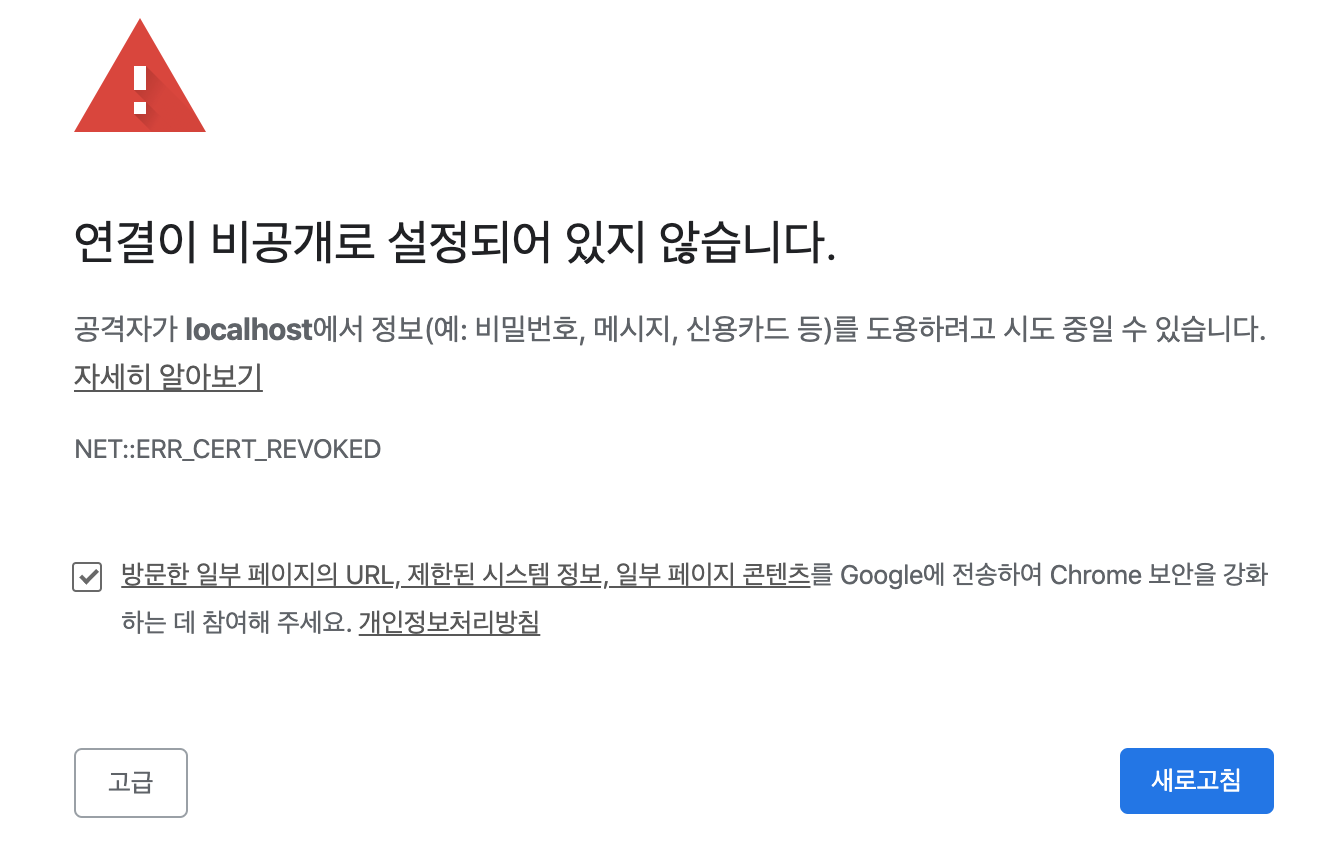
하지만 https://localhost:8080 으로 접속해도 아래와 같은 오류를 나타내며 접속되지 않는 것을 확인할 수 있다.

브라우저가 https를 통하여 접속 요청을 보내게 되면 서버는 인증서를 보낸다. 하지만 브라우저는 이 인증서의 public key를 모르기 때문에 이러한 화면이 출력된다.
대부분 신뢰할 수 있는 인증서 발급 기관에서 발급한 인증서의 public key는 브라우저가 대부분 알고 있기 때문에 녹색 경고창이 뜨지만 로컬에서 발급한 인증서의 경우 공식적으로 발급받은 인증서가 아니므로 신뢰할 수 없기 때문에 그럼에도 불구하고 접속을 할 것인지 경고창을 주게 된다. (Chrome[78.0.3904.108 버전]의 경우 아예 접속할 수 없도록 변경된 것 같다. 하지만 Safari에서 접속하면 접속할 것인지 묻는 버튼이 생성되고 클릭하면 정상 접속된다.)
또한 curl을 활용하여도 확인해볼 수 있다.

위와 같이 http로 접속하면 400을 리턴받게 되며 https로 접속한다면 200을 리턴받게 된다.
HTTP와 HTTPS를 둘다 받도록 설정
기본적으로 Spring Boot가 만들어 주는 HTTP Connector는 1개만 존재하며 HTTPS 로 변경한다면 HTTP로 접속할 수 없다.
하지만 Java 코드를 통해서 HTTP Connector를 추가해주면 2개를 동시에 받을 수 있다.
Application.java
@SpringBootApplication
@RestController
public class HttpApplication {

    @GetMapping("https")
    public String https(){
        return "Hello HTTPS";
    }

    public static void main(String[] args) {
        SpringApplication.run(HttpApplication.class, args);
    }

    @Bean
    public ServletWebServerFactory serverFactory () {
        TomcatServletWebServerFactory tomcat = new TomcatServletWebServerFactory();
        tomcat.addAdditionalTomcatConnectors(createStandardConnecter());
        return tomcat;
    }

    private Connector createStandardConnecter() {
        Connector connector = new Connector("org.apache.coyote.http11.Http11NioProtocol");
        connector.setPort(8081);
        return connector;
    }

}
위처럼 @Bean을 통하여 HTTP1.1을 사용하며 8081번 포트를 사용하는 Connector를 추가해주면 된다.
curl을 통한 결과는 아래와 같다.

3. 그 밖의 여러 응용 방법들
HTTP2를 사용하거나, 포트를 변경, 랜덤 포트 설정, ApplicationListener를 사용하여 서버의 포트를 가져오는 방법 등 아래 공식 문서의 링크에 여러 방법들이 소개되어 있다.
HTTP2를 사용하고 싶은 경우 SSL은 적용 되어 있는 상태에서 진행해야 하며, 컨테이너에 따라 설정파일이 다른데 위의 문서에 자세하게 나와있다.

